Once you have built your Yattaphone, you need to connect it to the internet and have a software that lets you make phone calls.
The connection script
Prior to running the script that you can find hereafter, you need to install some packages (in order to do that, connect the Raspberry to internet using WiFi or an Ethernet cable).
sudo apt-get update && sudo apt-get install libqmi-utils udhcpc
Next, you can insert in the 4G Board a SIM and connect to the internet through the following script:
!/bin/bash
sudo qmicli -d /dev/cdc-wdm0 –dms-set-operating-mode=’online’
#Check the signal
sudo qmicli -d /dev/cdc-wdm0 –dms-get-operating-mode
sudo qmicli -d /dev/cdc-wdm0 –nas-get-signal-strength
sudo qmicli -d /dev/cdc-wdm0 –nas-get-home-network
#Reconfigure the network interface for raw-ip protocol
sudo qmicli -d /dev/cdc-wdm0 -w
#this confirms the name of the network interface, typically wwan0
sudo ip link set wwan0 down
#change the wwan0 to the one returned above if different
echo ‘Y’ | sudo tee /sys/class/net/wwan0/qmi/raw_ip
sudo ip link set wwan0 up
#NOTE: replace “wap.tim.it” with the APN of your own SIM network and PASSWORD with your own password
sudo qmicli -p -d /dev/cdc-wdm0 –device-open-net=’net-raw-ip|net-no-qos-header’ –wds-start-network=”apn=’wap.tim.it’,username=’pi’,password=’PASSWORD,ip-type=4″ –client-no-release-cid
#configure the IP address and the default route with udhcpc
sudo udhcpc -i wwan0
ip a s wwan0
sleep 2
ip r s
If you wish, you can download this script here.
Note: sometimes it does not immediately work and you have to run it several times before it actually gets your Raspberry on the internet.
The phone calls interface
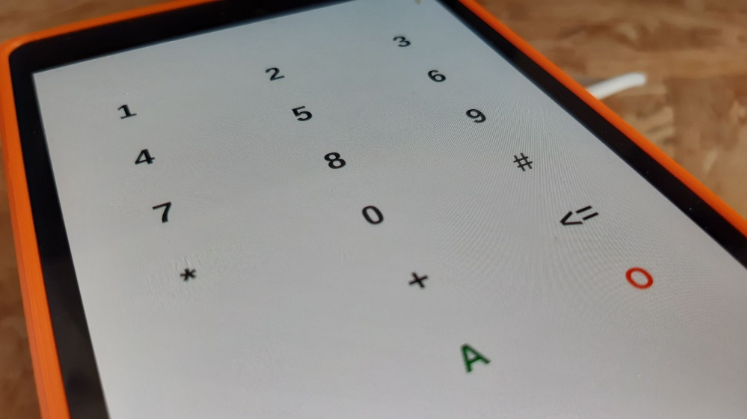
Next, you need an interface to make the calls. Here it is:
You can download it here.
It is a Python 3 script.
Note: in order to run it, you need to install all the needed Python 3 modules: threading, time, tkinter, RPi.GPIO, serial and pygame.
Then you can run the script:
python3 yattaphone.py
The C button Calls.
The A button Answers.
The O button hangs up.
The SMS button shows all the SMSs stored in the SIM memory.
The M button is for debug, it reads the serial. If everything works, you don’t need it, as the serial is checked (and its content displayed) once a second. Each time a point is printed out.
Note: if you do not see a new point in line every second, it means that it is not working and it is not checking the serial.
Enjoy.